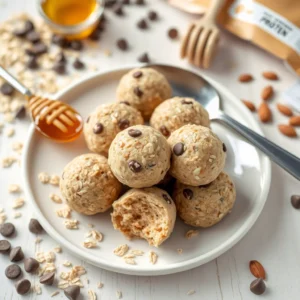
Cake Batter Protein Balls
These delightful little bites combine the rich taste of cake batter with a boost of protein, making them perfect for satisfying your sweet tooth while keeping your wellness goals intact.
Ingredients
- 1 cup rolled oats (or certified gluten-free oats)
- 1/2 cup whey or plant-based protein powder (choose based on dietary needs)
- 1/4 cup almond butter (or peanut butter for added richness)
- 1 tbsp honey or maple syrup (adjust sweetness to preference)
- 1/4 cup unsweetened applesauce
- 1 tsp vanilla extract
- 1 pinch salt
Optional
- 1/4 cup mini chocolate chips (dairy-free if preferred)
- 1/4 cup chopped nuts (almonds, walnuts, pecans)
- 1 tbsp chia seeds or flaxseeds
Instructions
- 1- Prepare Your Mixing Bowl Begin by combining the rolled oats and protein powder in a large mixing bowl. Stir thoroughly to ensure even distribution. This forms the base of your Cake Batter Protein Balls.
- 2- Add Wet Ingredients Next, add the almond butter, honey/maple syrup, applesauce, and vanilla extract to the dry ingredients. Mix everything until a dough-like consistency forms. If the mixture feels too dry, gradually add a splash of milk (almond, oat, or regular) until it reaches your desired texture.
- 3 - Incorporate Add-Ins Fold in any optional ingredients such as chocolate chips, nuts, or seeds. These additions not only enhance the flavor but also provide extra crunch and nutrition.
- 4- Form Into Balls Using clean hands, roll the mixture into bite-sized balls. For uniformity, use a cookie scoop or tablespoon to measure each portion before shaping. Aim for roughly 1-inch diameter balls.
- 5- Chill Before Serving Place the formed balls on a plate or tray lined with parchment paper. Transfer them to the refrigerator and chill for at least 30 minutes. Chilling helps the balls firm up and improves their texture.
- 6- Store Properly Once chilled, transfer the Cake Batter Protein Balls to an airtight container. Store them in the refrigerator for up to one week or freeze them for longer storage. Freezing extends their shelf life significantly, so feel free to prepare a larger batch for future snacking.
Notes
To ensure your Cake Batter Protein Balls turn out perfectly, keep these tips in mind:
- Consistency Matters: The key to successful protein balls lies in achieving the right consistency. If the mixture is too crumbly, add more applesauce or nut butter. If it’s too sticky, incorporate additional oats.
- Use High-Quality Ingredients: Opt for organic, non-GMO protein powders and natural sweeteners whenever possible. Better-quality ingredients yield better-tasting results.
- Don’t Overmix: While it’s important to blend the ingredients well, avoid overworking the dough. Overmixing can lead to dense, unappealing balls.
- Experiment with Sizes: While standard-sized balls are convenient, consider rolling some smaller ones for portion control or larger ones for a filling snack.